How To Register A Contact With Imessage On Mac
Phone Number Is Not Registered With Imessage Fix Macreports
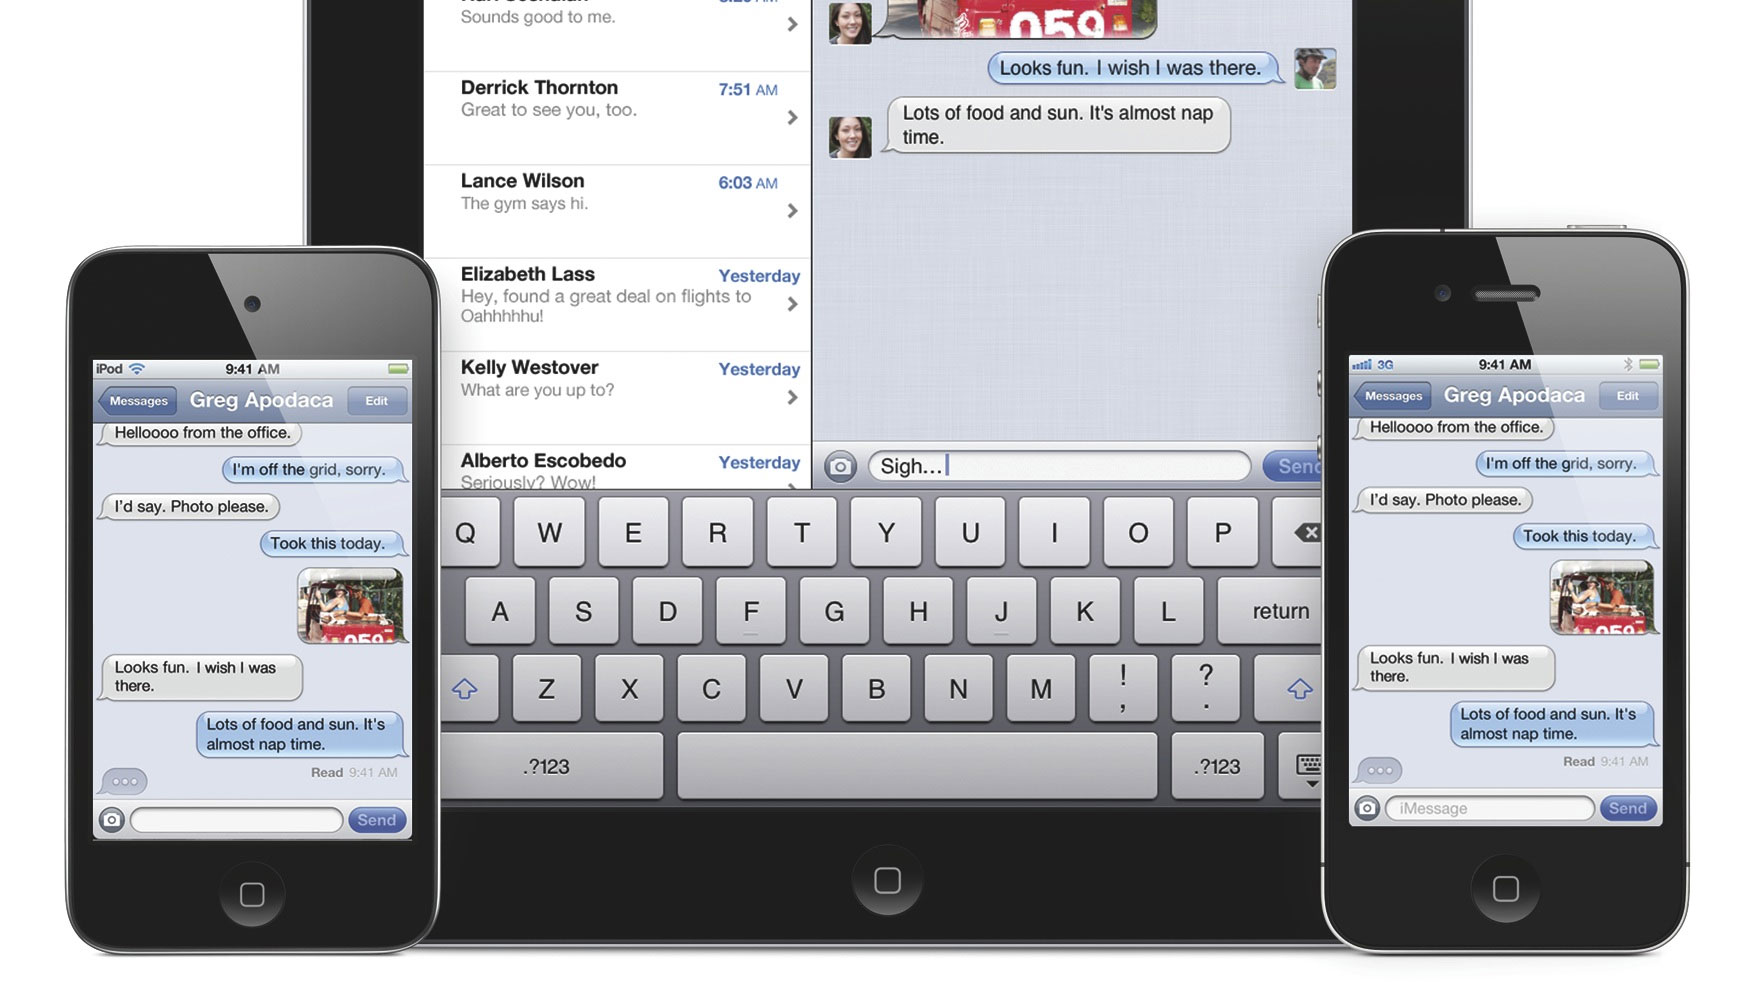
The Beginner S Guide To Imessage In Ios 5 Techradar
How To Fix Imessage Bug On Macos 10 15 Catalina

Z4y3wrcruqhy5m

13 Ways To Fix Error Occurred During Activation For Imessage Or Facetime Saint
How To Find Imessage Users Contacts From Iphone Or Mac Os X Osxdaily

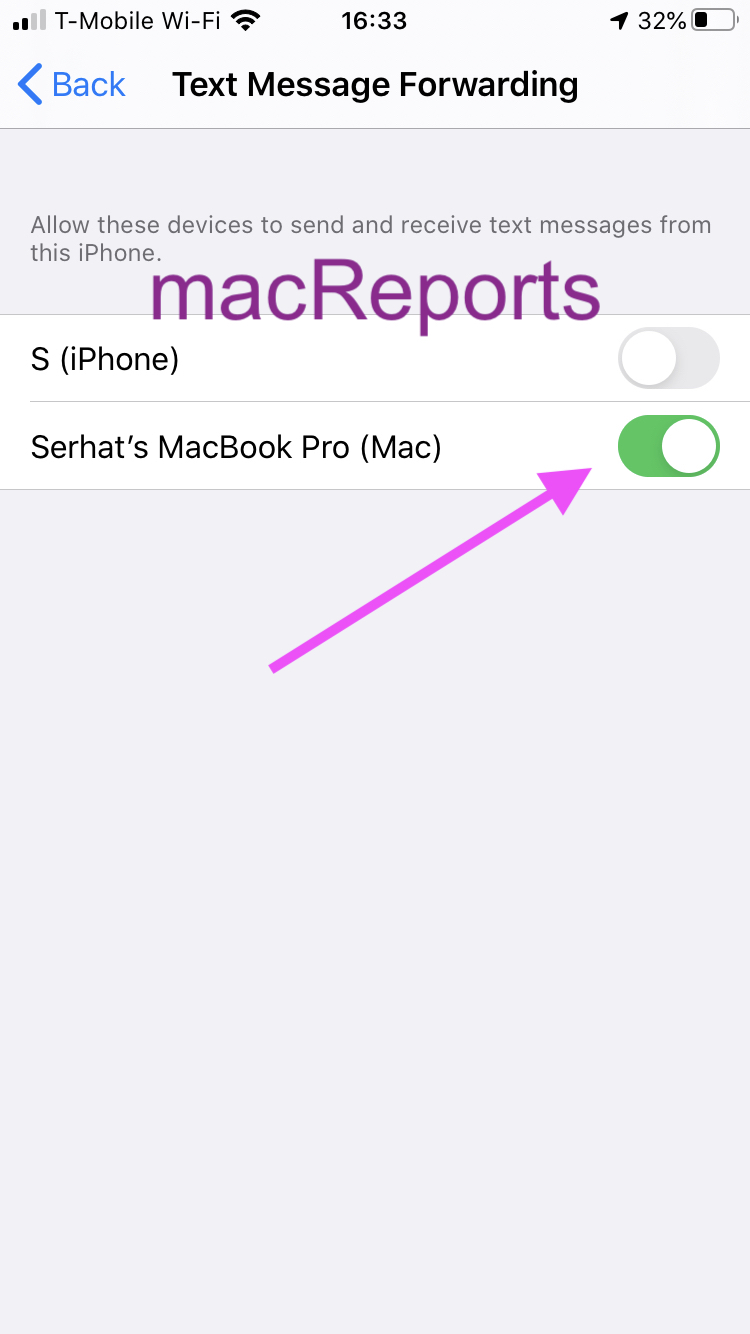
Using the same apple id sign back in to messages and facetime on your other devices.
How to register a contact with imessage on mac. Any support will be much appreciated. The device will verify your login information and then activate imessages if successful. And in other cases we might need to register a number with imessage on mac computer for smooth imessage texting. If it says the email is already in use this is because it is verified under a previous apple id. At the bottom you can choose which one you prefer to use when messaging new people.
In case that doesn t happen enter your apple id email address and password. Hence here in this page we would like to introduce you solutions on how to register a number with imessage on mac and iphone ipad respectively. Activation usually happens within an hour. Using an email based imessage account is the same as using a phone based one. The message is not registered with imessage pops up.
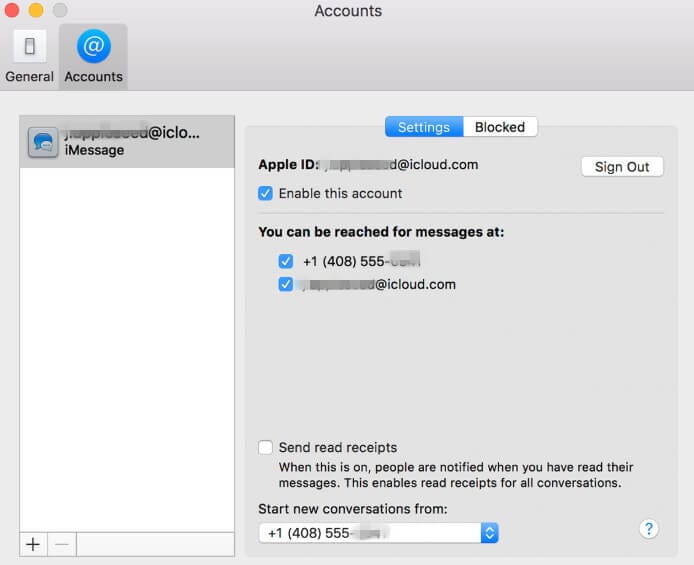
Currently i have an android phone and my mac is updated. You can message anyone using imessage even by their phone number. Launch messages from your desktop dock or applications folder. How to set up imessage on mac. Click on messages in the menu bar.
Tap send receive then choose use your apple id for imessage and sign in with your apple id. If you have two contacts such as your apple id and your phone number you can receive messages on both accounts. You can only use emails under one apple id. If you still need help change your apple id password and repeat the setup steps. Messages pulls the contacts from the contacts app so set up the people that you want to message with in the contacts app.
Click on the imessage tab. Not sure what this means but you tap on the blue button to bring up your contacts list and then select the contact from there. Registering a number with imessage might be a tough task for some people. By default the messages app will use your apple id to log you in. You need to go to manage my apple id sign in with this old apple id and remove the additional email address from that apple id before you can add it to the newer one.
Use Digital Touch On Your Iphone Ipad And Ipod Touch Apple Support

How To Stop Imessage Notifications On Your Macbook Imessage Macbook Icloud

Click Agree

How Apple S Imessage And Animated Gifs Could Change Communication The Creators Project Mobile Carrier Iphones For Sale Ipad Learning

How To Use Two Phone Numbers For Calls Messages And Data On Your Iphone Wise Tech Labs Phone Phone Numbers Iphone

Facetime Surveillance For Iphone Ipod Touch Ipad Ios 4 0

Pin On Apple Haberleri

Facebook Messenger Officially Gains Sms Support On Android Rolling Out Today Messaging App Sms Text Message Facebook Messenger

How To Send And Receive Text Messages On Your Mac Computer By The Internet Patrol Text Messages Messages Mac Computer

How To Protect Your Whatsapp Account With Two Step Verification How To Protect Yourself Accounting Samsung Galaxy Phone

Pin On Projects To Try

Ios 9 Instant Udid Activation Apple Ios Iphone Video Iphone
How To Enable Night Mode On Windows 10 Android Ios And Macos Health App App Iphone

